Home Window Replacement: The Complete Upgrade Guide
Outline
– Why replace windows now: comfort, efficiency, noise control, safety, and curb appeal
– Materials and glass tech: frame types, coatings, gas fills, and energy ratings
– Style and function: operable types, daylighting, code needs, and acoustics
– Budget and value: quotes, warranties, incentives, and long-term payback
– Installation roadmap: measuring, flashing, water management, and maintenance
Introduction
Windows are the thin line between your living room and the weather—between a home that hums with comfort and one that leaks energy, noise, and money. Replacing them is a rare project that can upgrade performance, safety, and style in one move, yet the options can feel like alphabet soup: U-factor, SHGC, VT, double-pane, triple-pane, composite frames, and more. This guide turns the jargon into clear choices tied to climate, budget, and goals, so your decisions feel informed rather than improvised. You’ll find practical comparisons, rules of thumb rooted in building science, and a stepwise plan to move from measuring to installation and care. Whether you’re chasing lower bills, quieter rooms, better daylight, or a fresher facade, the following sections map the path from drafty to dialed-in.
Why Replace Windows: Comfort, Savings, and Signals It’s Time
Windows do far more than frame a view—they shape temperature, sound, light, and safety every day. Energy analyses in typical North American homes show that windows can account for roughly 25–30% of heating and cooling energy use when older or poorly sealed, which is why upgrading can move the needle on both comfort and costs. If you’ve ever stood by a window and felt a winter chill or a summer blast, you’ve experienced conductive and convective heat transfer first-hand; modern insulated glass and tighter frames blunt both effects.
Start by diagnosing. Common signs that windows are ready for retirement include warped sashes, rot in wood frames, cracked glazing putty, fogging between panes (failed seals), difficulty opening or locking, and paint that peels year after year because trapped moisture never fully dries. Drafts are the loudest clue, but subtle cues matter too: furniture facing south fading from UV exposure, or condensation pooling on sills during cold snaps. Noise intrusion is another giveaway. Older single-pane assemblies often deliver Sound Transmission Class (STC) ratings in the high 20s, while upgraded double-pane units, and especially laminated glass packages, can add several decibels of attenuation—less traffic rumble, fewer 4 a.m. deliveries waking the household.
Comfort improvements show up quickly. Lower interior glass temperatures in winter mean warmer radiant conditions, so you don’t need to crank the thermostat just to feel cozy near the couch. In summer, coatings tuned to reduce solar heat gain help rooms stay even, making bedrooms bearable at night without overworking the system. That steadier indoor climate can also support HVAC longevity by smoothing extreme swings. The savings story is straightforward: if your annual heating and cooling spend is, say, $1,800, even a conservative 12–18% efficiency bump can free up $216–$324 each year, compounding over time.
Safety and code compliance are part of the equation. Tempered glass is typically required near doors, in wet areas like tub surrounds, and in low sills where impact risk is higher. Bedrooms usually need at least one egress-capable window with minimum clear opening dimensions to allow escape and firefighter entry (local codes vary; verify details before ordering). Finally, aesthetics count: windows command attention on a facade. Upgrades can unify proportions, refresh trim color, and restore symmetry—small changes that make a home feel newly cared for without changing its bones.
– Signals to act: fogged insulated units, binding sashes, spongy sills, cold drafts, UV fading, road noise
– Benefits you’ll notice: steadier room temps, quieter interiors, less condensation, UV protection, stronger curb appeal
– Added peace of mind: improved locks, tempered safety glazing where required, and egress-compliant openings
Materials and Glass Technology Demystified
Choosing a window starts with the frame—the structural and thermal backbone. Vinyl frames are widely used for their affordability and low maintenance, with chambers that reduce heat transfer; they can expand and contract with temperature swings, so quality construction and reinforcement matter in large spans. Wood frames offer natural insulation and a timeless look, but they ask for periodic sealing or paint in exposed conditions. Aluminum brings slim profiles and strength yet conducts heat rapidly; thermally broken designs mitigate that transfer. Fiberglass stands out for dimensional stability and durability, with low expansion rates that keep seals tight over decades. Composite frames blend materials to balance stiffness, insulation, and weather resistance with minimal upkeep.
Next is the glazing package. Double-pane insulated glass units (IGUs) sandwich a sealed gas-filled space (commonly argon) between panes; triple-pane systems add a second cavity, dropping heat flow further and boosting comfort near the glass. Low-emissivity (low-e) coatings are microscopically thin metal layers that reflect infrared energy. Hard-coat low-e is durable and can allow more solar gain for cold climates, while soft-coat low-e often delivers lower U-factors and stronger UV blocking—useful in mixed or warm regions. Gas fills help slow conduction; argon is cost-effective and widely available, while krypton excels in narrower cavities, often used in high-performance or specialty units. Spacers at the perimeter matter too: “warm-edge” spacers reduce thermal bridging and help curb edge condensation.
Decoding the label is where confidence grows. Four metrics guide most choices:
– U-factor: overall insulating performance; lower numbers indicate less heat loss. Many efficient double-pane packages land around 0.27–0.30 (lower for triple-pane).
– Solar Heat Gain Coefficient (SHGC): fraction of solar heat admitted; lower blocks more sun. In hot-sunny climates, aim lower to limit cooling loads; in colder climates, modestly higher SHGC can help with passive winter warmth on south-facing elevations.
– Visible Transmittance (VT): how much daylight passes; higher means brighter interiors but consider glare and privacy.
– Air Leakage (AL): a measure of how drafty a unit is; lower ratings mean tighter assemblies.
Climate alignment is the quiet hero. A north-facing living room in a cold zone may thrive with a low U-factor and moderate SHGC to milk winter sun, while a west-facing kitchen in a hot region benefits from a low U-factor and especially low SHGC to tame afternoon spikes. Triple-pane can shine in very cold or high-noise locations (with laminated panes), but in mild climates, a thoughtfully specified double-pane low-e unit often delivers excellent performance per dollar. Finally, specify UV blocking if you protect art, rugs, or wood floors; modern low-e stacks can filter most UV, noticeably slowing fading without plunging rooms into gloom.
Style, Function, and Design Choices
Form follows function, but with windows the two dance together. Operable styles shape airflow patterns, views, and ease of cleaning. Double-hung units allow sashes to move up and down; cracking the top sash improves cross-ventilation while keeping the lower sash closed for child safety. Casements hinge at the side and catch breezes like a sail, often sealing very tightly when latched—great for energy performance. Awnings hinge at the top to vent during rain; sliders move horizontally with wide openings and simple maintenance. Fixed and picture windows frame views and boost daylight at high efficiency, often paired with operable neighbors. Bay and bow assemblies project outward, stealing a little space for a bench or plants while expanding sightlines.
Think about the room’s job before choosing. Bedrooms often need egress-capable windows: local rules commonly call for a minimum clear opening area and height/width thresholds, plus a sill low enough for quick exit. Kitchens and baths benefit from awnings or casements near sinks and tubs to shed weather; tempered glazing is usually required in splash zones. Living spaces love daylight: pairing a large fixed picture window with flanking operables provides a balance of view, ventilation, and efficiency. For upper floors, tilt-in features make cleaning safer from inside.
Granular options add polish and performance:
– Grilles: between-the-glass grilles simplify cleaning; simulated divided lites offer depth and historic character.
– Screens: full, half, or retractable styles control insects without dimming daylight; fine-mesh designs can improve clarity.
– Privacy and decor: obscure, frosted, or patterned glass suits baths and street-facing sidelites while maintaining luminance.
– Acoustics: laminated panes, wider airspaces, and asymmetric glass thickness can lift STC and OITC ratings, softening traffic or flight paths.
Daylighting strategy is worth a plan. High VT glass brightens interiors and can shrink lighting loads, but balance against glare on work surfaces or screens; place operable units to invite prevailing breezes and exhaust warm air where it stratifies. Orientation matters for comfort too: shade west-facing glass with overhangs or trees to blunt low-angle sun, while allowing south winter sun to reach interior thermal mass in cold regions. Finally, respect the home’s language—sash proportions, trim width, and color coordination unify facades. A modest change, like aligning head heights across elevations or choosing slimmer meeting rails, can make the whole exterior read as more intentional, even if nothing else changes.
Budget, Quotes, and Long‑Term Value
Cost clarity starts with scope. Replacement windows typically fall into two installation buckets: insert (or pocket) replacements that fit into existing frames, and full-frame replacements that remove everything down to the rough opening, allowing new flashing and insulation around the perimeter. Insert installs are faster and less disruptive, often favored when existing frames are sound and square; full-frame costs more but reset the clock on weatherproofing and can correct hidden damage.
As a planning range, many homeowners see per-unit totals (product plus typical labor) around:
– Basic insert vinyl units: roughly $300–$700 each
– Mid-range double-pane low-e packages in vinyl, composite, or fiberglass: roughly $600–$1,200 each
– Premium or large-format, specialty shapes, triple-pane, or complex installations: $1,200–$2,500+ each
Labor varies with access and details. Second-story work, stucco cutbacks, historical trim replication, or interior finishing can push labor by a few hundred dollars per opening. Expect line items for disposal, exterior touch-ups, and possible lead-safe practices in older homes. Permits and inspections, where required, typically add modest fees; lead times often run 4–10 weeks from order to delivery, with seasonal spikes in spring and fall. Warranties commonly cover insulated glass seals for a decade or more and hardware for a period; read terms carefully and register after installation.
Value lives beyond the invoice. Energy savings from tighter assemblies and tuned coatings frequently land in the low double digits for heating and cooling reductions, depending on climate and baseline conditions. On a $1,800 annual HVAC bill, a 12–18% cut suggests $216–$324 back each year; over 10 years that’s $2,160–$3,240 before utility rate changes. Quieter rooms and gentler temperatures near glass are hard to price but easy to feel. Resale impact tends to be favorable when upgrades are visible, code-compliant, and backed by transferable warranties; buyers appreciate fresh units with consistent operation and finish.
Do not overlook incentives. Utilities and local programs sometimes offer per-window or per-square-foot rebates for qualifying ENERGY-efficient products. In the U.S., a federal energy efficiency credit has periodically allowed homeowners to claim a portion of eligible costs, subject to annual caps and product criteria; verify current rules and documentation requirements before purchase. A simple spreadsheet can weigh options: add product, labor, expected savings, maintenance (paint cycles, sealant refreshes), and any incentives. Then compare lifecycle cost rather than sticker price alone; a slightly higher upfront investment can be the frugal choice when it reduces utility spend and upkeep for decades.
Installation, Codes, and Maintenance: From Measure to Warranty
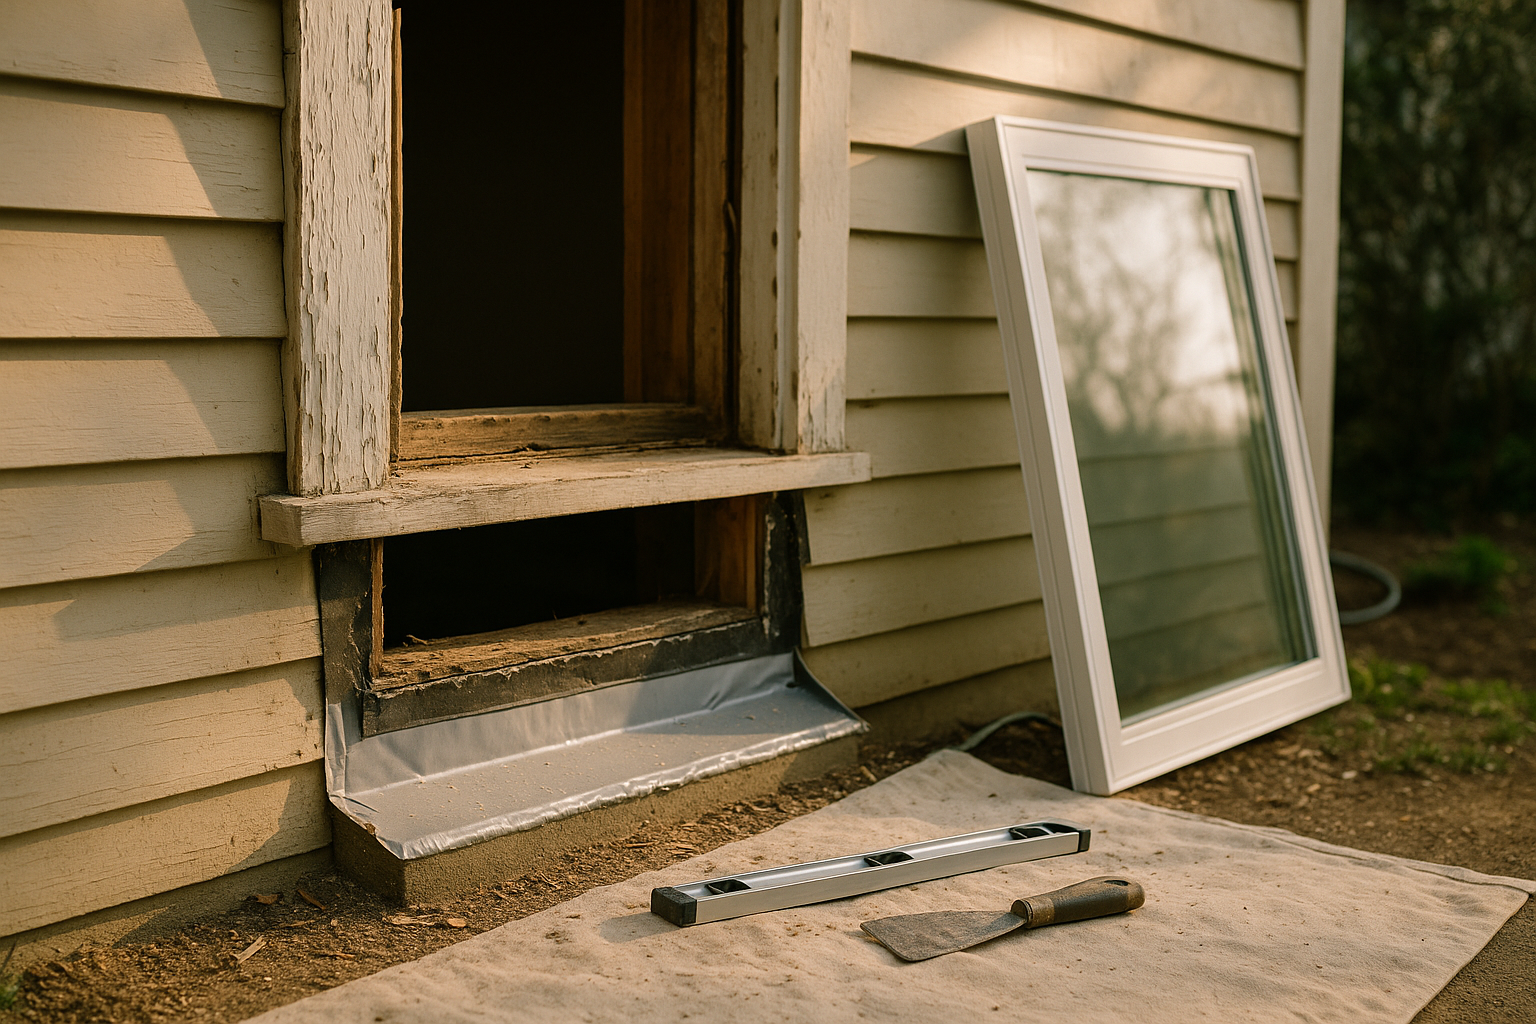
A strong installation is a weatherproofing exercise as much as a carpentry task. Start with precise measurements: record width at top, middle, and bottom; height at left, center, and right; use the smallest numbers and note out-of-square conditions. Decide early between insert and full-frame. For full-frame, budget time to assess the sill for slope and rot; water follows gravity, so a properly sloped, flashed sill pan is nonnegotiable. For inserts, confirm that the existing frame is sound and shimmed plumb and level to avoid binding sashes and uneven reveals.
Water and air management drive the details. Integrate self-adhered flashing tapes into the water-resistive barrier, shingle-lapped so water always drains outward. A preformed or site-built sill pan (with back dam) directs any incidental moisture to the exterior. Use corrosion-resistant fasteners per manufacturer spacing, and set the unit with continuous support at the sill. Gaps should be filled with low-expansion foam or mineral wool to insulate without bowing frames; backer rod and high-quality sealant complete perimeter joints, allowing controlled movement. On the exterior, preserve drainage paths and weeps; inside, reinstall trim with even reveals, then verify smooth operation and snug locks.
Codes and safety checkpoints to respect:
– Tempered safety glazing near doors, in wet zones, and in larger low-sill panels where impact risk is elevated
– Egress-capable openings in sleeping rooms with minimum clear dimensions and sill height limits (local specifics vary)
– Fall protection or opening control devices where low sills occur on upper floors
– Energy code targets for U-factor and SHGC depending on climate zone
DIY or pro? If you are comfortable with flashing details, diagnostics, and adjusting out-of-square openings, insert installs can be approachable. Full-frame replacements, structural changes, or complex cladding interfaces (stucco, masonry) usually favor a licensed installer with documented flashing practices. When soliciting bids, ask about sill pans, tape types, foam density, and how they integrate with existing WRB; a clear, step-by-step answer signals craft. Request photos of similar projects and confirm that warranties cover both product and workmanship.
After installation, inspect thoughtfully. Operate every sash, verify weeps, spray-test suspect joints from the exterior, and register all serial numbers for warranty coverage. Maintenance is light but real: wash tracks and gaskets, lubricate moving parts with manufacturer-approved products, renew exterior sealants every few years as needed, and keep weep paths clear of debris. Wood elements should be painted or sealed on schedule; screens can be removed and cleaned annually. A brief seasonal checklist—spring and fall—catches small issues before they grow, preserving performance and appearance for the long run.
Conclusion: A Clear View to a Better Home
Window replacement pays you back in quieter rooms, steadier temperatures, and a facade that feels refreshed—but only when choices match your climate, goals, and budget. Use the outline as your roadmap: diagnose, select materials and glass that fit, align style with function, and hire for flashing and detailing as carefully as you pick finishes. Gather two or three detailed quotes, confirm code and incentive details, and track lifecycle costs, not just price tags. With that plan, your home will feel brighter, calmer, and more efficient for years to come.